

Workspace modes
W&B projects support two different workspace modes. The icon next to the workspace name shows its mode.| Icon | Workspace mode |
|---|---|
 | Automated workspaces automatically generate panels for all keys logged in the project. Choose an automatic workspace:
|
 | Manual workspaces start as blank slates and display only the panels you intentionally add. Choose a manual workspace:
|
Undo changes to your workspaceTo undo changes to your workspace, click the Undo button (arrow that points left) or press Cmd+Z (macOS) or Ctrl+Z (Windows or Linux).
Reset a workspace
Reset a workspace to change its mode or clear its panels to start fresh. To reset a workspace:- At the top of the workspace, click the action () menu.
- Click Reset workspace.
Configure the workspace layout
Workspace layout settings control how panels and sections are organized and displayed across the whole workspace. To configure the workspace layout, click Settings near the top of the workspace, then click Workspace layout. The following settings are available:- Hide empty sections during search (turned on by default)
- Sort panels alphabetically (turned off by default)
- Section organization (grouped by first prefix by default). To modify this setting:
- Click the padlock icon.
- Choose how to group panels within a section.
Configure a section’s layout
To configure the layout of a section, click its gear icon, then click Display preferences. The following settings are available:- Turn on or off colored run names in tooltips (turned on by default)
- Only show highlighted run in companion chart tooltips (turned off by default)
- Number of runs shown in tooltips (a single run, all runs, or Default)
- Display full run names on the primary chart tooltip (turned off by default)
View a panel in full-screen mode
Full-screen mode gives a panel more space, which is useful for closer inspection of your data. In full-screen mode, the run selector displays. To view a panel in full-screen mode:- Hover over the panel.
- Click the panel’s action () menu, then click the full-screen button, which looks like a viewfinder or an outline showing the four corners of a square.
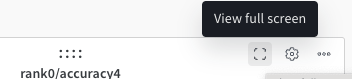
- To return to a panel’s workspace from full-screen mode, click the left-pointing arrow at the top of the page.
- To navigate through a section’s panels without exiting full-screen mode, use either the Previous and Next buttons below the panel or the left and right arrow keys.
- To reclaim more space for the panel, minimize the run selector with Cmd+. (macOS) or Ctrl+. (Windows or Linux).
- When you view an image from a media panel in full-screen mode, keyboard shortcuts can zoom in or out, reset zoom, or zoom to fit. See Keyboard shortcuts.
Add panels
The following sections describe ways to add panels to your workspace. You can add panels one at a time or automatically for each key you select. You can also ask ARIA to add panels for you.Add a panel manually
Add panels to your workspace one at a time, either globally at the workspace or at the section level.Add panels to a workspace
- Navigate to your project workspace.
- Click Add panels located to the right of the panel search field.
- From the modal that appears, select the type of panel to add such as a chart, media, or query panel.
Add panels to a section
- Navigate to your project workspace.
- Optional: Create a new section. Scroll to the bottom of the workspace and click Add section.
- Click the section’s action () menu, then click + Add panels.
- From the modal that appears, select the type of panel to add such as a chart, media, or query panel.
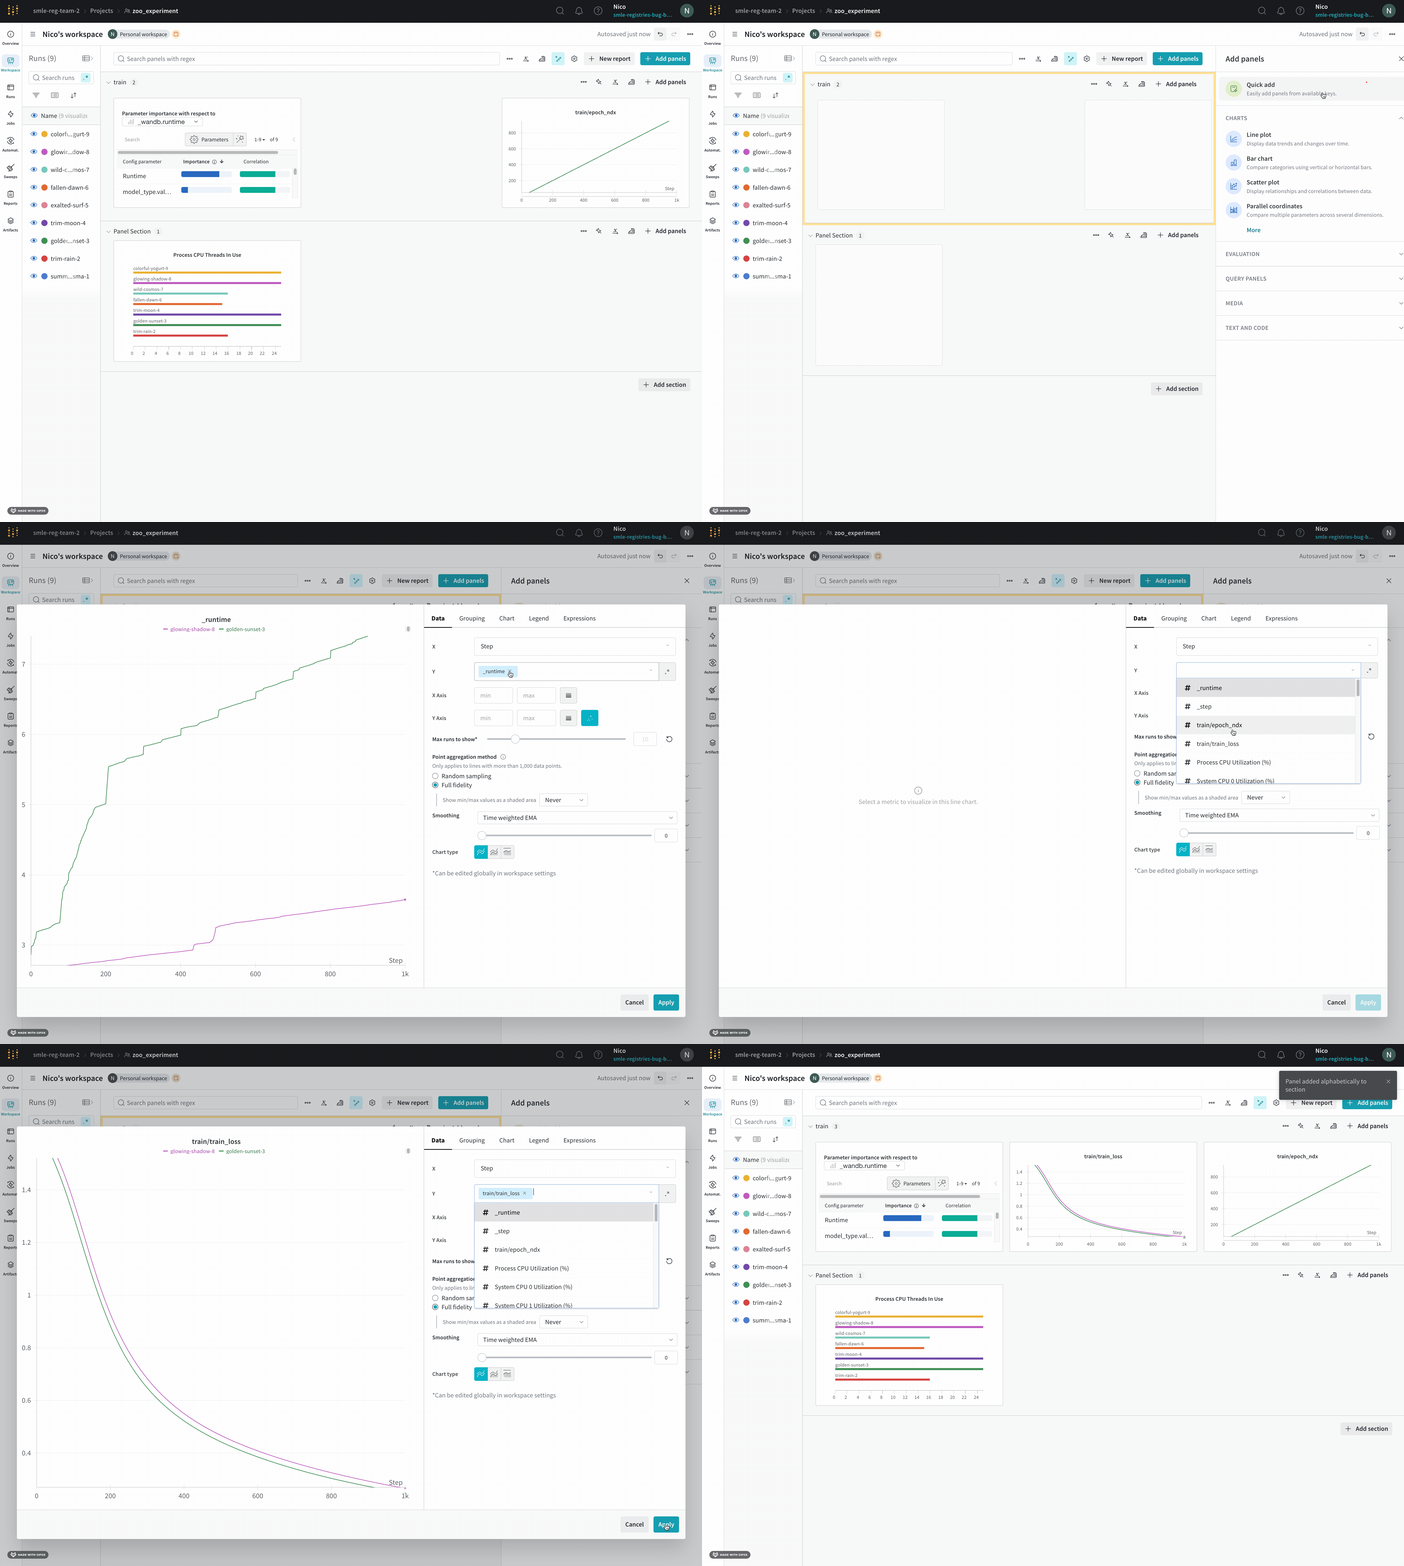
Quick panel builder
Use Quick panel builder to automatically create panels for selected metric keys at the workspace or section level.In an automatic workspace, Quick panel builder is hidden if panels already exist for all logged keys. If you delete a panel, use Quick panel builder to add it again.
For example, suppose your workspace includes
train/loss and val/loss metric keys. You can use Quick panel builder to create panels in either of the following ways:
- Single-key panels: Creates two panels, one for
train/lossand one forval/loss. - Multi-metric panels: Using the regular expression
.*\/losscreates one panel containing both metrics.
Add panels to the workspace
- Navigate to your project workspace.
- Select Add panels next to the panel search field, then select Quick panel builder.
- Select Single-key panels or Multi-metric panels.
- Specify the metric keys or regular expression in the search field.
- Complete the following step based on the creation mode:
- Single-key panels: Hover over a metric key, then select Add. Repeat for each metric key you want to add.
- Multi-metric panels: Specify a regular expression to create a panel containing the matching metric keys. Click Add panel.
Add panels to a section
- Navigate to your project workspace.
- Optional: To create a section, scroll to the bottom of the workspace and select Add section.
- In the section, select Add panel, then select Quick panel builder.
- Select Single-key panels or Multi-metric panels.
- Specify the metric keys or regular expression in the search field.
- Complete the following step based on the creation mode:
- Single-key panels: Hover over a metric key, then select Add. Repeat for each metric key you want to add.
- Multi-metric panels: Specify a regular expression to create a panel containing the matching metric keys. Click Add panel.
Share a panel
Share a panel to send collaborators directly to a focused view of a specific visualization without navigating to the full workspace. To share a panel using a link, do one of the following:- While viewing the panel in full-screen mode, copy the URL from the browser.
- Click the action () menu, then click Copy panel URL.
Compose a panel’s full-screen link programmatically
When you create an automation or similar workflow, it can be useful to include the panel’s full-screen URL. The following format shows a panel’s full-screen URL. In the following example, replace the entity, project, panel, and section names in brackets.Embed or share a panel on social media
To embed a panel in a website or share it on social media, the panel must be viewable by anyone with the link. If a project is private, only members of the project can view the panel. If the project is public, anyone with the link can view the panel. To get the code to embed or share a panel on social media:- From the workspace, hover over the panel, then click its action () menu.
- Click the Share tab.
- Change Only those who are invited have access to Anyone with the link can view. Otherwise, the choices in the next step aren’t available.
- Choose Share on Twitter, Share on Reddit, Share on LinkedIn, or Copy embed link.
Email a panel report
To email a single panel as a stand-alone report:- Hover over the panel, then click the panel’s action () menu.
- Click Share panel in report.
- Select the Invite tab.
- Enter an email address or username.
- Optional: Change can view to can edit.
- Click Invite. W&B sends an email to the user with a clickable link to the report that contains only the panel you’re sharing.
Manage panels
After you add panels to a workspace, you can edit, move, duplicate, or remove them to keep your visualizations organized and up to date.Edit a panel
To edit a panel:- Click its pencil icon.
- Modify the panel’s settings.
- Optional: To change the panel to a different type, select the type and then configure the settings.
- Click Apply.
Move a panel
To move a panel to a different section, you can use the drag handle on the panel. To select the new section from a list instead:- Optional: Create a new section by clicking Add section after the last section.
- Click the action () menu for the panel.
- Click Move, then select a new section.
Duplicate a panel
To duplicate a panel:- At the top of the panel, click the action () menu.
- Click Duplicate.
Remove panels
To remove a panel:- Hover over the panel.
- Click the action () menu.
- Click Delete.
Manage sections
Sections group related panels together, making it easier to scan large workspaces. By default, sections in a workspace reflect the logging hierarchy of your keys. However, in a manual workspace, sections appear only after you start adding panels.Add a section
To add a section, click Add section after the last section. To add a new section before or after an existing section, you can instead click the section’s action () menu, then click New section below or New section above.Manage a section’s panels
Within a section, you can resize panels, control pagination, and delete individual panels. Sections with many panels are paginated by default. The default number of panels on a page depends on the panel’s configuration and on the sizes of the panels in the section. To resize a panel, hover over it, click the drag handle, and drag it to adjust the panel’s size. Resizing one panel resizes all panels in the section. If a section is paginated, you can customize the number of panels to show on a page:- At the top of the section, click 1 to
[X]of[Y], where[X]is the number of visible panels and[Y]is the total number of panels. - Choose how many panels to show per page, up to 100.
- Hover over the panel, then click its action () menu.
- Click Delete.